Difference between revisions of "1-player challenger"
(→Central Arena: finished up central arena opponents) |
(rewrote main intro and active challenger intro. Added Obelisk section.) |
||
| Line 1: | Line 1: | ||
{{Construction|reason=Opponents need to be added.}} | {{Construction|reason=Opponents need to be added.}} | ||
'''1-player challengers''' are [[Wikipedia:Artificial intelligence|AI]]-controlled opponents that users can fight in the [[Battledome]]. There are many different challengers, and each challenger has a unique set of [[Battledome equipment|equipment]] and [[Faerie Abilities|abilities]]. There are three levels of toughness for each challenger. The higher the toughness level, the more HP the challenger will have. Many [[plot]]s have exclusive challengers. These plot-exclusive challengers are usually [[retired]] as soon as their associated plot ends. | |||
== | ==Normal Challengers== | ||
After a user unlocks a normal challenger, they may fight them at any time. While a handful of these challengers are unlocked by default, most of them have to be unlocked by performing certain actions on the [[Neopets|Neopets website]]. | |||
===Rattling Cauldron=== | ===Rattling Cauldron=== | ||
{|style="margin:0 auto | {|style="margin:0 auto; text-align:center;" class="wikitable" | ||
|-valign=top | |-valign=top | ||
|style="width:110px;"|[[Image:Portrait 7.png]]<br>[[Balthazar#Battledome|Balthazar]] | |style="width:110px;"|[[Image:Portrait 7.png]]<br>[[Balthazar#Battledome|Balthazar]] | ||
| Line 37: | Line 38: | ||
===Frost Arena=== | ===Frost Arena=== | ||
{|style="margin:0 auto | {|style="margin:0 auto; text-align:center;" class="wikitable" | ||
|-valign=top | |-valign=top | ||
|style="width:110px;"|[[Image:Portrait_208.png]]<br>[[Donny#Battledome|Donny]] | |style="width:110px;"|[[Image:Portrait_208.png]]<br>[[Donny#Battledome|Donny]] | ||
| Line 55: | Line 56: | ||
===Pango Palladium=== | ===Pango Palladium=== | ||
{|style="margin:0 auto | {|style="margin:0 auto; text-align:center;" class="wikitable" | ||
|-valign=top | |-valign=top | ||
|style="width:110px;"|[[Image:Portrait 86.png]]<br>[[Advisor Broo#Battledome|Advisor Broo]] | |style="width:110px;"|[[Image:Portrait 86.png]]<br>[[Advisor Broo#Battledome|Advisor Broo]] | ||
| Line 73: | Line 74: | ||
===Neocola Centre=== | ===Neocola Centre=== | ||
{|style="margin:0 auto | {|style="margin:0 auto; text-align:center;" class="wikitable" | ||
|-valign=top | |-valign=top | ||
|style="width:110px;"|[[Image:Portrait 63.png]]<br>[[Commander Garoo#Battledome|Commander Garoo]] | |style="width:110px;"|[[Image:Portrait 63.png]]<br>[[Commander Garoo#Battledome|Commander Garoo]] | ||
| Line 91: | Line 92: | ||
===Dome of the Deep=== | ===Dome of the Deep=== | ||
{|style="margin:0 auto | {|style="margin:0 auto; text-align:center;" class="wikitable" | ||
|-valign=top | |-valign=top | ||
|style="width:110px;"|[[Image:Portrait 24.png]]<br>[[Chiazilla#Battledome|Chiazilla]] | |style="width:110px;"|[[Image:Portrait 24.png]]<br>[[Chiazilla#Battledome|Chiazilla]] | ||
| Line 103: | Line 104: | ||
===Ugga Dome=== | ===Ugga Dome=== | ||
{|style="margin:0 auto | {|style="margin:0 auto; text-align:center;" class="wikitable" | ||
|-valign=top | |-valign=top | ||
|style="width:110px;"|[[Image:Portrait 37.png]]<br>[[Cave Chia#Battledome|Cave Chia]] | |style="width:110px;"|[[Image:Portrait 37.png]]<br>[[Cave Chia#Battledome|Cave Chia]] | ||
| Line 120: | Line 121: | ||
===Central Arena=== | ===Central Arena=== | ||
{|style="margin:0 auto | {|style="margin:0 auto; text-align:center;" class="wikitable" | ||
|-valign=top | |-valign=top | ||
|style="width:110px;"|[[Image:Portrait 90.png]]<br>[[Boochi#Battledome|Boochi]] | |style="width:110px;"|[[Image:Portrait 90.png]]<br>[[Boochi#Battledome|Boochi]] | ||
| Line 143: | Line 144: | ||
==Battleground of the Obelisk Challengers== | ==Battleground of the Obelisk Challengers== | ||
... | These challengers were first made available during the [[War for the Obelisk]] plot. Now a days, they can only be fought as part of the [[Battleground of the Obelisk]] site feature. All of these challengers are fought in the Ugga Dome. | ||
{| class="wikitable" style="margin:0 auto;text-align: center;" | |||
|- | |||
|style="width:110px;"|[[Thieves Guild]] | |||
|style="width:110px;"|[[The Sway]] | |||
|style="width:110px;"|[[Order of the Red Erisim]] | |||
|style="width:110px;"|[[Brute Squad]] | |||
|style="width:110px;"|[[Seekers]] | |||
|style="width:110px;"|[[Awakened]] | |||
|-valign=top | |||
||[[Image:Portrait 215.png]]<br>[[Petty Pilferer]] | |||
||[[Image:Portrait 218.png]]<br>[[Amateur Insider]] | |||
||[[Image:Portrait 216.png]]<br>[[Ganfrey the Good|Minor Warlock]] | |||
||[[Image:Portrait 217.png]]<br>[[Rent-a-Brute]] | |||
||[[Image:Portrait 222.png]]<br>[[Gyro|Assistant Scientist]] | |||
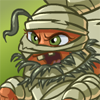
||[[Image:Portrait 221.png]]<br>[[Halima the Enraged|Grumpy Mummy]] | |||
|-valign=top | |||
||[[Image:Portrait 224.png]]<br>[[Roadside Bandit]] | |||
||[[Image:Portrait 226.png]]<br>[[Charming Subversive]] | |||
||[[Image:Portrait 225.png]]<br>[[Hilda the Hedgewitch|Hedgewitch]] | |||
||[[Image:Portrait 223.png]]<br>[[Buster|Back Alley Bruiser]] | |||
||[[Image:Portrait 228.png]]<br>[[Sandro|Smug Philosopher]] | |||
||[[Image:Portrait 227.png]]<br>[[Olabet Shuffletoes|Zombie Hooligan]] | |||
|-valign=top | |||
||[[Image:Portrait 229.png]]<br>[[Midnight Smuggler]] | |||
||[[Image:Portrait 233.png]]<br>[[Nefarious Plotter]] | |||
||[[Image:Portrait 231.png]]<br>[[Belisarius|Licensed Conjurer]] | |||
||[[Image:Portrait 230.png]]<br>[[Alhana the Patient|Brutal Mercenary]] | |||
||[[Image:Portrait 232.png]]<br>[[Tom Cotterpin|Stalwart Explorer]] | |||
||[[Image:Portrait 234.png]]<br>[[Echo|Ghostly Knight]] | |||
|-valign=top | |||
||[[Image:Portrait 235.png]]<br>[[Shady Prowler]] | |||
||[[Image:Portrait 240.png]]<br>[[Lord Norheim|Cunning Mastermind]] | |||
||[[Image:Portrait 237.png]]<br>[[Alshemar of the Seventh Scroll|Master Wizard]] | |||
||[[Image:Portrait 236.png]]<br>[[Martha|Unyielding Sentinel]] | |||
||[[Image:Portrait 239.png]]<br>[[Katie|Genius Inventor]] | |||
||[[Image:Portrait 238.png]]<br>[[Unchained Monster]] | |||
|-valign=top | |||
||[[Image:Portrait 242.png]]<br>[[Kanrik|Kanrik, Master Thief]] | |||
||[[Image:Portrait 246.png]]<br>[[The Duchess]] | |||
||[[Image:Portrait 241.png]]<br>[[Rasala the Bright]] | |||
||[[Image:Portrait 243.png]]<br>[[Commander Flint]] | |||
||[[Image:Portrait 244.png]]<br>[[Professor Lambert]] | |||
||[[Image:Portrait 245.png]]<br>[[Lanie and Lillie]] | |||
|- | |||
|} | |||
==Retired Challengers== | ==Retired Challengers== | ||
Revision as of 20:49, 26 September 2014

|
This page is under construction |
|---|---|
| Opponents need to be added. |
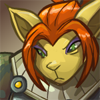
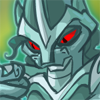
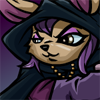
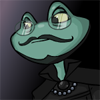
1-player challengers are AI-controlled opponents that users can fight in the Battledome. There are many different challengers, and each challenger has a unique set of equipment and abilities. There are three levels of toughness for each challenger. The higher the toughness level, the more HP the challenger will have. Many plots have exclusive challengers. These plot-exclusive challengers are usually retired as soon as their associated plot ends.
Normal Challengers
After a user unlocks a normal challenger, they may fight them at any time. While a handful of these challengers are unlocked by default, most of them have to be unlocked by performing certain actions on the Neopets website.
Rattling Cauldron
 Balthazar |
 Count Von Roo |
 Edna |
 Giant Ghostkerchief |
 Greedy Kadoatie |
 Jelly Chia |
 Meuka |
 Mummy |
 Pant Devil |
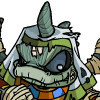 Qasalan Mummy |
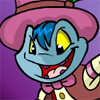 Sidney |
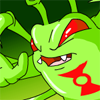 Spider Grundo |
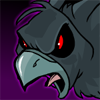 The Black Pteri |
 The Brain Tree |
 The Esophagor |
 Vira |
 Zafara Rogue |
Frost Arena
 Donny |
 Lady Frostbite |
 Snow Beast |
 Snow Faerie |
 The Snowager |
 Valin |
Pango Palladium
 Advisor Broo |
 Ghost Lupe |
 Lava Ghoul |
 Meerca Henchmen |
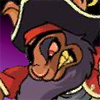 Plumbeard |
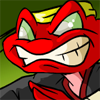 Ryshu the Nimmo |
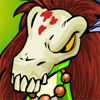 Tekkitu the Witch Doctor |
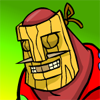 Tiki Tack Man |
Neocola Centre
 Commander Garoo |
 Evil Sloth Clone |
 Neopets V2 |
 Robo Grarrl |
 S750 Kreludan Defender Robot |
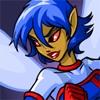 Space Faerie |
Dome of the Deep
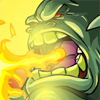 Chiazilla |
 Giant Spectral Mutant Walein |
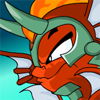 Koi Warrior |
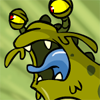 Slug Monster |
 The Drenched |
Ugga Dome
 Cave Chia |
 Cybunny Scout |
 Giant Hungry Malevolent Chomby |
 Grarrg |
 Harry the Mutant Moehog |
 Highland Chia |
 Kastraliss |
 Magnus the Torch |
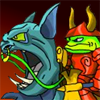 Quiggle Warlord |
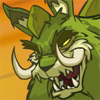 Sabre-X |
Central Arena
 Boochi |
 Chia Clown |
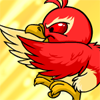 Down For Maintenance Pteri |
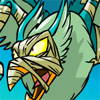 Eyrieki |
 Flaming Meerca |
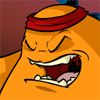 Kasuki Lu |
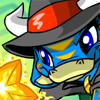 Kauvara |
 Lab Ray Scientist |
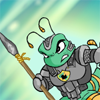 Mootix Warrior |
 Mr. Chuckles |
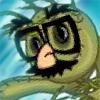 Punchbag Bob |
 Punchbag Bob (Sid) |
 Shadow Usul |
 Tax Beast |
 Turmaculus |
Battleground of the Obelisk Challengers
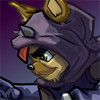
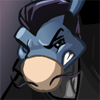
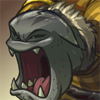
These challengers were first made available during the War for the Obelisk plot. Now a days, they can only be fought as part of the Battleground of the Obelisk site feature. All of these challengers are fought in the Ugga Dome.
Retired Challengers
...to be added...
Trivia
- Six faeries (Air, Water, Earth, Fire, Dark, Light) were available for the old Faerie League. They are now retired and so is the Faerie League.
